buy lego modular buildings

PinLego Christmas VillageLego Winter VillageHoliday LegosLego Christmas WinterNice ChristmasChristmas VillagesChristmas DisplaysChristmas ScenesVillage I'LlForwardBrick Town Talk: December 2011 - LEGO Town, Architecture, Building Tips, Inspiration Ideas, and more!See Morepin 25heart 3PinLegos BuildingsLego Modular BuildingsLego Buildings HousesHouse BrickadelicsBricklyn BikeBike BarLego WorldwideLego SicknessLikable LegosForwardBricklyn Bike | Flickr - Photo Sharing!See Morepin 139heart 12PinBuilding LayoutLego Modular BuildingsShop PerfectLego ModularsAwesome CustomLego ModelsCustom LegoLego ArchitectureBike ShopForwardA bike shop perfect for a modular building layoutSee Morepin 154heart 13speech 1PinMax LegoLegos TooLego BauanleitungenToys LegoLego KnexDom LegoHousing LegoLego Modular BuildingsCity BuildingsForwardModular Buildings Official StandardsSee Morepin 116heart 17PinLego Buildings ResidentialLego Modular BuildingsLego StructuresLego ArchitectureLego HousesLego FacadeModular HousesCity HousesClassic ArchitectureForwardJapanese Restaurant & Board Shop - Modular Building: A LEGO® creation by Brian Lyles

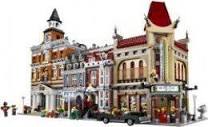
: See Morepin 455heart 57PinMy Idea is for a Modular set , An Odeon Art deco Cinema. Yes I know that this has been done in set 10184. As you can see that's where I got my inpiration from. But we always n...pin 13heart 2PinLeno ModularModular LegoLego Modular BuildingsLego HousesModular BakeryLego BakeryStore ModularModular BrickadelicsLego CuusooForwardModular Bakery and Hardware Store #modular #brickadelicsSee Morepin 180heart 18PinHalf Modular Jewelry Storepin 8heart 1PinMoc ModularModular IdeasEpic LegosAwestome LegosShop BuildingsLego BuildingsPiazza MariaModularsbykristel PassionateAfol MocsForwardmodularsbykristel | /photos/125619484@N02/20138613714/See Morepin 44heart 5This guide showcases some of the ways you can use Brickstuff lights to light LEGO® Modular Buildings. This guide illustrates several methods for using Brickstuff LED Light Strips to illuminate two LEGO® Modular Building kits: the Grand Emporium (10211) and the Pet Shop (10218). Although this guide addresses the LEGO® Modular Building sets, the lighting techniques described here can be used to light any structure or creation.
If you are lucky enough to have a sub-basement or other pathway out the back of a building, consider yourself lucky!
buy lego juniors batman After you've examined the possible pathways for your wires, it's a good idea to test-mount the lights and connecting cables, to make sure everything fits with a little slack left over. After you've identified paths for your wiring within the structure of your creation, you should decide on a wiring arrangement. There are two basic arrangements: A "Home Run" feeder wire arrangement A "Daisy Chain" feeder wire arrangement The two illustrations in this step outline both of these arrangements in more detail (click on the images to view larger). In general, Home Run feeder wire arrangements are better when you want to control lighting independently (for instance, switching lights on and off on the third floor), or when you have a very large installation with 100 lights or more.

Daisy Chain feeder wire arrangements are convenient when running lighting into multiple buildings, or when conserving cables and/or adapters I important. When deciding on an arrangement, it's a good idea to test both the Home Run and Daisy Chain designs, to see which provides the best overall effect. If you are using Brickstuff Lighting Strips, you can mount the lights using the self-adhesive backing. If mounting in a LEGO® creation, we recommend attaching the Light Strips to 1x6 plates first-- this ensures a snug fit, but also allows for repositioning later if needed. As a general rule, you should avoid removing mounted light strips and trying to re-affix them to another surface-- the adhesive will wear out and strips may not stay in place. Brickstuff Micro Light Boards have been specially designed to fit inside a standard 1x1 LEGO® brick. Even if you are not mounting inside a LEGO® creation, you will appreciate the small 4x4mm size of the Light Boards-- they allow you to put light just about anywhere you need it.

Depending on where you need to mount the Micro Light Board, it may be possible to install the board without needing to use adhesive. If adhesive is required to hold the board in place, you can use one of the self-adhesive squares that are supplied with each Micro Light Board kit. If you need to install the Light Board into a round space that is smaller than the board itself (for example, inside a round 1x1 LEGO® brick), you can delicately sand the corners of the board. Click here to view a usage guide that describes the sanding process in detail. Regardless of the wiring arrangement you use, you should plan on using three Brickstuff Light Strips (or the equivalent of six LEDs) per floor of a LEGO® Modular Building. If you are not mounting your lights inside a LEGO® creation, or if your creation is not a building, you will need to experiment a bit to find the lighting mix that works best for you. When mounting your lights, begin from the top floor of a building (or the least accessible part of your creation) and begin installation there.

On each floor of a building (or in each section of a creation), it is best to daisy-chain lights. If mounting in a LEGO® creation, you can use 1x1 LEGO® plates to hold the connecting cables in place. Note that yellow bricks have been used in the illustrations to the left-- this was just for emphasis. We recommend white plates for the Light Strips and black plates to hold wires in place. When installing Light Strips in a LEGO® creation, you can use the 1x6 plate the strip is mounted on to hide slack in the wires. Loop the connecting cable underneath the plate holding the Light Strip as shown in the illustrations. Use the holes and pathways you identified earlier to run wires between floors or between areas of your creation. The first photo in this step shows a feeder wire from an upper floor passing through a balcony opening. The second photo shows a feeder wire passing behind a spiral staircase from a higher floor. The third photo shows multiple feeder wires passing through an opening behind an escalator.

If you use the Home Run wiring arrangement, you will need to run multiple feeder wires to the ground level or exit point of your creation, so keep an eye out for pathways capable of holding several wires. Also in the third photo, an adapter board was needed and was able to fit directly into a ceiling cavity. The adapter board is held in place with two 1x2 LEGO® plates. before finalizing your installation it is a good idea to test all of your lights to make sure they operate, and also to make sure they are positioned correctly to deliver the effect you desire. It is also important to make sure that you have enough slack in your wiring installation, so plugs and connections won't be tugged or pulled when you lift roofs, open doors, etc. While you are checking for sufficient slack, also don't forget to make sure you have slack in your feeder wires, to allow them to pass through floors and sections without pulling. Once everything looks good, connect your power supply.